How to Mount an Outboard Motor on Your Boat?
The outboard motor is one of the widely used equipment on a boat. Mounting your outboard motor to its best position is essential for protecting the engine from harm, enhancing operator comfort (where applicable), and achieving optimal performance.
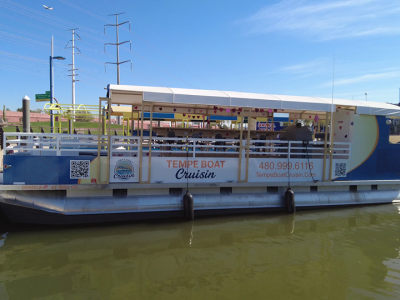
Whether you have an aluminum boat, dingy, Jon boat, bass boat, or RIB, we will give you some precautions for how to successfully mount an outboard engine on the transom.
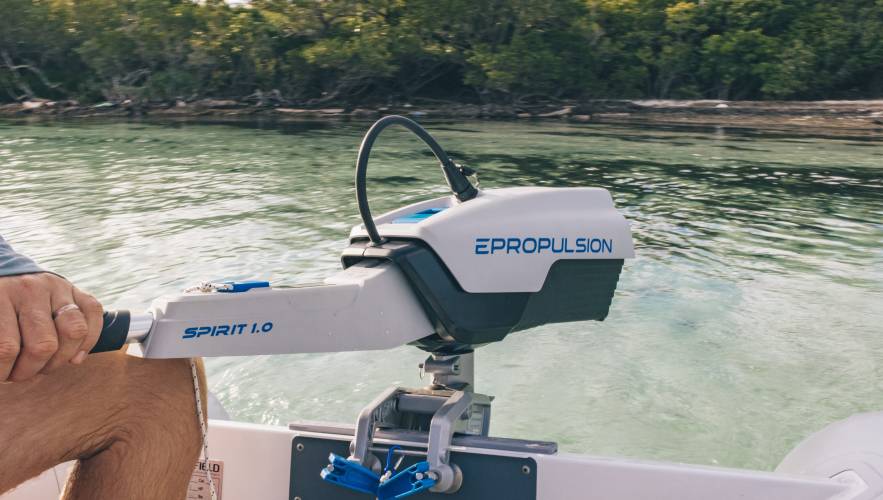
Editor's Note: In this post, we are talking about electric outboard motors especially (taking the ePropulsion Navy Series as an easy example), since the electric motor is trendy recently with straightforward and user-friendly installation steps. The mounting process for the gasoline outboard motor may differ from the electric model.
Table of content:
Before Installation
Before mounting an outboard motor on a boat, we need to gauge the boat, including the height and thickness of the boat transom.
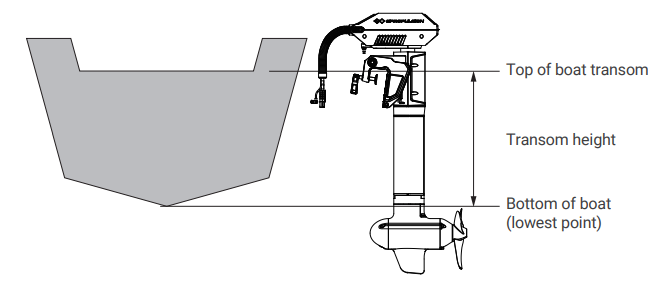
1. Measure the height of your boat transom.
The mounting height of the outboard affects the running speed seriously.
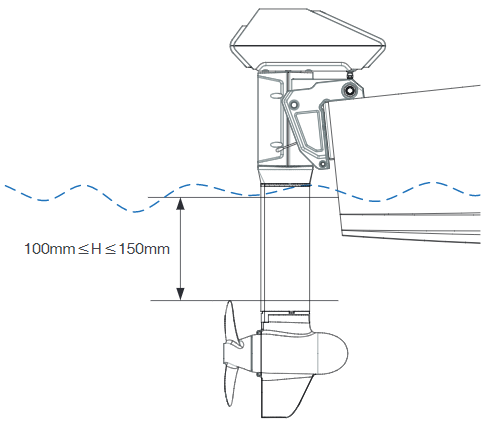
When the mounting height is too high, cavitation may occur, which may lead to speed slowdown, energy waste, and propeller damage. When the mounting height is too low, the water resistance will reduce the speed and energy (electricity or fuel) efficiency and performance of the outboard engine.
In most cases, the anti-cavitation plate is between the bottom of the boat and a level 25 mm (1 in) below it. For the motor without anti-cavitation plate, the top of the propeller should be 100mm to 150mm below the water.
The optimal mounting height is affected by the specific conditions of a boat. In order to get the optimal mounting height, it’s suggested to test running by mounting the outboard at different heights. Otherwise, you can consult your marine engine dealer for more information on how to mount an outboard motor.
2. Find the suitable shaft Length
Different heights of boat transom require disparate shafts of the outboard motor. Here is a simple chart that helps you to find the suitable shaft length as per the range of outboard transom height.
Pro Tip: if your outboard motor is still hard to reach the water, you may need to install an outboard motor bracket first.
For more information about the selection of shaft length, check out our previous post: How to Find Your Shaft Length
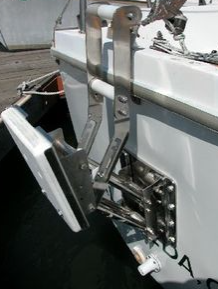
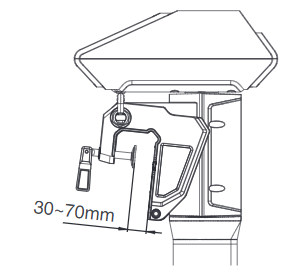
3. Make sure it's feasible to mount an outboard motor on the boat transom
If you want to install an outboard engine on the boat, you need to make sure the thickness of the transom is in the range of 30~70mm.
Notes: If you're re-powering an older boat, the first thing is to examine the transom once the old motor is off. Some parts of the transom are prone to deteriorate as time goes by. For instance, laminated plywood. It's wise to ask your dealer to check the structural integrity of the boat transom. Just to make sure that you don’t mount an outboard engine to a rickety transom.
3 Steps to Mount the Motor
Just follow the steps below and you can learn how to mount an outboard motor easily.
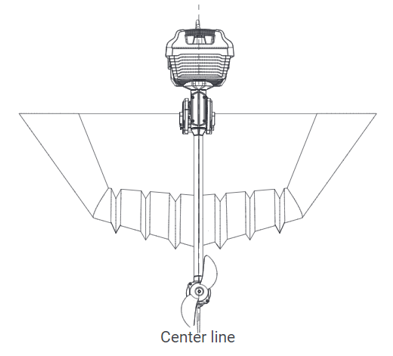
1. Place outboard on the center line of transom
The outboard engine should be mounted on the center line (keel line) of your boat so that the boat is well-balanced. Otherwise, the boat could be hard to steer. If the boat shape is asymmetric, please consult your dealer for a proper solution.
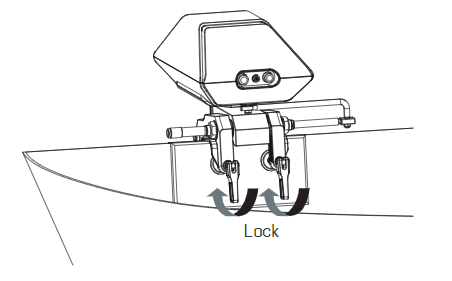
2. Tighten the transom clamp bolts firmly
Firstly, place the outboard motor on the transom so that it is positioned as close to the center as possible. Then tighten the clamp screws evenly and securely.
Cautions:
- Please make sure the clamp screws are tightened securely. Occasionally check the clamp screws for tightness during the operation of the outboard motor in case the clamp bolts become loose because of engine vibration. Stainless steel bolts are recommended because they will not rust.
- Please note that loose clamp screws could allow the outboard motor to fall off or move on the transom. This could cause a loss of control and serious injury.
- Unlike gasoline motors, most electric outboard motors do not need a motor bracket, backing plate, or drill mounting holes, especially for the small boat.
3. Use two screws to fix the outboard to the boat
If you want to mount the outboard motor more firmly, the method of using screws to install an outboard on the boat transom is recommended. Ensure the outboard motor is firmly fixed as loosened clamp screws may cause the outboard engine to fall into the water or get damaged.
Check the screws or clamps every time before use since they may be loosened due to mechanical vibrations.
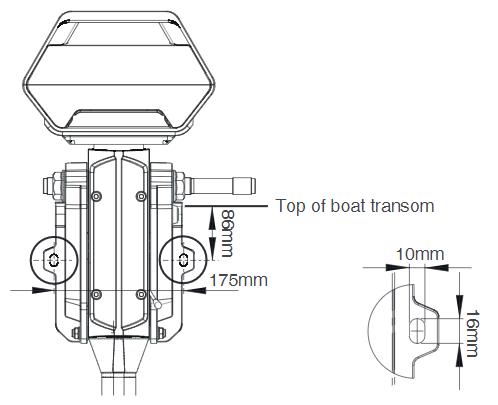
A cable is recommended to be used to avoid complete loss of your outboard motor in case it falls off the boat transom. The dimensions of the two mounting holes are shown below.
You can also learn how to install an outboard motor in this video Electric Outboard Motor | ePropulsion Spirit 1.0 Evo from the youtube channel Sailing Fair Isle.
Conclusion
Whether you are first-timers or those who have recently purchased a boat, from now on, you have learned some basic knowledge of how to install an outboard motor on a boat transom. Whether you own an aluminum boat, fishing boat, jet boat, or pontoon boat, please enjoy it and have fun! Boating is always one of the best and most relaxing casual moments that you can have.
* The information presented in this section is intended as a reference only. It is not possible to provide complete instructions for every possible boat and motor combination. Please consult your dealer for more information and assistance.